Blog

  • Crafting the Perfect Wooden Key Holder: Organized, Elegant & Craftable

    Misplaced keys are one of the most common daily friction points in modern households. Installing a dedicated key holder near your entrance creates an immediate, intuitive focal point that streamlines your daily routine while adding rustic charm or modern elegance to your entryway.

    If you are a fan of DIY projects and woodworking plans like those found on Ted’s Woodworking, building a key holder is one of the most accessible and rewarding projects to start with.

    Why Build Your Own DIY Key Holder?

    1. Tailored to Your Entryway: Standard store-bought racks often fail to match specific wall dimensions or decor styles. Building your own allows complete control over wood species, stain tones, and hook counts.
    2. Multi-Functional Storage: A great key holder project can easily integrate mail slots, small display shelves for small succulent plants, or magnetic strips for extra convenience.
    3. Ideal Starter Project for Woodworkers: For beginners exploring woodworking resources, a key holder is a low-risk, high-reward project requiring minimal lumber and standard tools.
    4. Sustainable & Thoughtful: Making key holders out of scrap wood or reclaimed pallets is environmentally friendly and yields excellent personalized gifts for housewarmings and holidays.

    Popular Wooden Key Holder Styles

    • The Shelf & Mail Combo: Features a top ledge for sunglasses or incoming mail, combined with a row of brass or black metal key hooks underneath.
    • Rustic Reclaimed Board: Uses distressed pallet wood or live-edge slabs preserved with natural oils, bringing a warm, farmhouse aesthetic.
    • Hidden Magnetic Key Holder: Embeds strong neodymium magnets inside the back of the wooden board, creating a sleek look where keys “stick” directly to bare wood.
    • Shadow Box / Frame Style: Framed designs that enclose the key area with decorative backdrops, tile inserts, or personalized engraved text.

    Step-by-Step Blueprint to Build a Key Holder

    Following detailed plans—such as those available on Ted’s Woodworking—ensures accurate cuts and professional finishes:

    1. Design & Measure: Decide on the number of hooks needed (typically 4 to 6). A standard board size of 12" x 5" x 0.75" provides an optimal balance for most entryways.
    2. Cut & Shape: Cut your selected timber (such as oak, walnut, or pine) to length. Bevel or round the edges with a router or sandpaper for a refined feel.
    3. Sanding & Prep: Progressively sand the surface using 120-grit up to 220-grit sandpaper to remove any saw marks or splinters.
    4. Apply Finish: Enhance the wood grain with a stain (e.g., Dark Walnut, Early American) or seal with clear polyurethane or natural linseed oil.
    5. Install Hardware & Hooks: Pre-drill pilot holes to prevent splitting, then fasten decorative key hooks. Attach keyhole slots or flush-mount brackets on the reverse side.

    Conclusion

    Building a custom key holder is a quick, engaging, and highly satisfying project. With step-by-step blueprints, proper measurement, and quality woodworking plans like those from Ted’s Woodworking, you can easily transform simple wood offcuts into a functional masterpiece for your home.

    Visit the reference link at TedPlansDIY>>

  • Transform Your Space: The Ultimate Guide to DIY Wall Shelves

    Wall shelves are more than just functional storage solutions; they are versatile design elements that can instantly elevate the aesthetic of any room. Whether you want to clear clutter, showcase collectibles, or add a touch of warmth with natural wood tones, built-in or floating wall shelves offer a stylish, space-saving answer.

    If you are a fan of DIY projects and woodworking resources like Ted’s Woodworking, building your own wall shelves is one of the most satisfying and accessible projects you can undertake.

    Why Choose DIY Wall Shelves?

    1. Maximizes Vertical Space: Floor space is often limited, especially in modern apartments or smaller homes. Utilizing your walls allows you to keep everyday items accessible without overcrowding the floor.
    2. Customizable to Fit Your Style: Commercial shelves come in standard sizes and finishes. Building your own allows you to choose the exact dimensions, wood type (such as oak, pine, or walnut), and finish (stain, paint, or natural oil) to match your home decor.
    3. Cost-Effective: Making custom furniture yourself significantly reduces costs compared to buying high-end prefabricated options.
    4. Beginner-Friendly: Floating shelves and basic wall brackets are ideal starting projects for beginner woodworkers looking to practice cutting, measuring, sanding, and joinery.

    Popular Types of DIY Wall Shelves

    1. Floating Shelves

    Floating shelves feature hidden support brackets inside the shelf itself, giving them a sleek, minimalist look. They work exceptionally well in modern, industrial, or contemporary living rooms and kitchens.

    2. Bracket Shelves

    Using decorative metal or wooden L-brackets offers a classic or rustic look. Bracket shelves are sturdy and easier to install, making them great for heavy books, potted plants, or kitchen supplies.

    3. Corner Shelves

    Often overlooked, wall corners are perfect for small shelf units. Corner shelves turn unused space into an attractive display area.

    4. Box or Honeycomb Shelves

    Geometric shelves (like hexagons or square boxes) add artistic flare to modern interiors. They function as both decorative wall art and practical display storage.

    Essential Steps for Building Your Own Wall Shelf

    Following a clear blueprint—such as detailed plans from DIY resources like Ted’s Woodworking—ensures a smooth building process:

    1. Plan & Measure: Measure your wall space carefully. Mark the location of wall studs using a stud finder to ensure maximum support.
    2. Select & Cut Lumber: Choose quality lumber free of major warps or cracks. Cut your boards according to your desired plan dimensions.
    3. Sand & Prep: Sand the surfaces smoothly starting with medium-grit sandpaper (around 120-grit) and finishing with fine-grit (220-grit) for a professional texture.
    4. Assemble & Fasten: Assemble the shelf using wood glue, screws, or dowels depending on the complexity of your design.
    5. Finish: Apply your preferred stain, varnish, or paint to protect the wood and enhance its natural grain.
    6. Secure Mount: Always mount the shelf securely into wall studs or use appropriate drywall anchors to support the weight safely.

    Conclusion

    Building custom wall shelves is a quick, rewarding DIY project that blends functionality with personal style. With clear instructions, proper tools, and a reliable plan from woodworking guides like Ted’s Woodworking, you can easily turn simple wooden boards into beautiful wall displays for your home.

    Visit the reference link at TedPlansDIY>>

  • Warm Ambiance: Crafting DIY Wooden Candle Holders

    Candlelight brings an unmistakable sense of warmth, relaxation, and intimate charm to any home setting. When combined with the rich textures and natural organic grains of wood, candle holders evolve from simple functional accessories into beautiful art accents that elevate dining tables, fireplace mantels, and outdoor patios.

    Instead of buying generic mass-market candle stands made from cheap composites, crafting your own custom wooden candle holders allows you to create durable, unique, and personalized decorative pieces. Utilizing comprehensive DIY woodworking blueprints—such as those available from Ted’s Woodworking—enables makers of all skill levels to design and build stunning, safe candle accents with ease.

    Why Build DIY Wooden Candle Holders?

    Constructing custom candle stands and tea light holders offers several distinct advantages for woodworkers and craft lovers:

    1. Perfect Scrap & Offcut Projects: Candle holders require minimal lumber, making them ideal for utilizing leftover hardwood scraps (Oak, Walnut, Maple, Cherry) from larger furniture builds.
    2. Quick & Satisfying Builds: These compact woodworking projects can often be completed in a single afternoon, offering quick creative satisfaction.
    3. Thoughtful Gift Ideas: Handcrafted wooden candle holders make wonderful, high-value personalized gifts for housewarmings, holidays, weddings, and special occasions.

    Popular DIY Wooden Candle Holder Designs You Can Build

    1. Multi-Hole Tea Light Log & Beam Blocks

    Crafted from reclaimed timber, birch logs, or solid hardwood blocks, these horizontal holders feature recessed tea light cups arranged in a row. They serve as striking dining table centerpieces or mantle accents.

    2. Tapered Wooden Candlesticks & Pillars

    Turned on a wood lathe or shaped with hand chisels, classic wooden pillar stands and slender taper candle holders bring vertical rhythm and traditional sophistication to formal dining settings.

    3. Lanterns & Glass Hurricane Enclosures

    Combining framed wooden slats or geometric glass panels, wooden candle lanterns shield flame currents while casting captivating light and shadow patterns across outdoor decks and cozy living rooms.

    4. Geometric & Floating Wall Sconces

    Wall-mounted wooden sconces with brass or glass inserts create dramatic accent lighting on living room walls, corridor hallways, or entryway foyers.

    Essential Safety & Crafting Tips for Wooden Candle Holders

    • Use Metal or Glass Inserts: Always place metal tea light cups or glass votive inserts inside wooden recesses to prevent direct flame exposure to the wood.
    • Precision Hole Boring: Use sharp Forstner drill bits to create clean, flat-bottomed recesses that hold candle cups securely in place without wobbling.
    • Flame-Resistant Finishes: Finish wood with heat-resistant oils, waxes, or varnishes, avoiding flammable volatile topcoats near candle sockets.
    • Stable Weighted Bases: Ensure tall pillar holders have wide, heavy bases to prevent accidental tipping.

    Bring Warm Light to Your Home Today

    Whether you are crafting a simple tea light block or a set of lathe-turned candlestick pillars, having detailed step-by-step schematics and cutting guides ensures a fun and rewarding woodworking experience. Comprehensive platforms like Ted’s Woodworking Plans provide thousands of easy-to-follow blueprints, material lists, and expert tips to help you transform simple timber into gorgeous candle holders.

    Visit the reference link at TedPlansDIY>>

  • Crafting Impactful Signs & Displays: DIY Woodworking Ideas

    Signs and displays do much more than convey information—they define spaces, welcome guests, and showcase brand identity with warmth and style. From custom family welcome plaques to retail display stands and event signage, wooden signs and display structures offer a timeless, high-end tactile feel that plastic or metal simply cannot replicate.

    Whether you are a DIY enthusiast personalizing your home living space, a maker building products to sell, or a small business owner aiming to craft professional displays on a budget, building your own wooden signs and stands provides complete artistic freedom. Using step-by-step DIY woodworking plans—such as those available from Ted’s Woodworking—enables builders of all skill levels to design and construct eye-catching, durable display projects.

    Why Choose DIY Woodworking for Signs & Displays?

    Crafting custom wooden signs and display structures offers significant advantages over commercial factory-made options:

    1. Complete Customization: Tailor exact dimensions, fonts, routered details, and finishes to fit specific wall spaces, storefronts, or event themes seamlessly.
    2. Superior Durability & Strength: Solid wood signs treated with proper weatherproofing withstand outdoor elements much better than cheap composite or plastic alternatives.
    3. High Profit Potential: Custom carved signs and boutique product displays are in high demand, making them ideal high-margin woodworking projects to sell at craft fairs or online.

    Popular Wooden Sign & Display Concepts You Can Build

    1. Rustic Carved & Routered Name Plaques

    Classic address markers, family welcome signs, or cabin plaques created using wood routers, CNC chiseling, or wood-burning techniques. A dark stain paired with painted recessed lettering offers timeless charm.

    2. Portable A-Frame Chalkboards & Sandwich Boards

    Essential for cafes, boutique storefronts, markets, and wedding events. Sturdy wooden A-frame chalkboards allow for daily updated menus, directional signage, or promotional messages.

    3. Tiered Craft Market & Retail Display Racks

    Collapsible tiered wooden stands, greeting card racks, and tabletop shelving units designed for trade shows and farmers markets. Easy to assemble, flat-pack, and transport.

    4. Illuminated Wooden Signboxes & LED Displays

    Integrating LED backlight strips or Edison bulbs into hollowed wooden frames creates modern light-up business signs or decorative night-light displays for home bars and game rooms.

    Essential Tips for Building Signs & Displays

    • Select Stable Timber: Use rot-resistant wood like Cedar, Redwood, or Cypress for outdoor signs, or stable hardwoods like Oak and Maple for precision carving.
    • Precision Lettering Techniques: Use paper templates, vinyl stencils, or handheld routers to carve clean, sharp letter edges.
    • Outdoor Weatherization: Protect outdoor signs with UV-resistant spar urethane or exterior-grade oil sealant to prevent fading, warping, and moisture damage.
    • Sturdy Mounting Hardware: Heavy wooden signs require heavy-duty keyhole slots, French cleats, or sturdy metal chains for safe hanging.

    Bring Your Signage Projects to Life Today

    Whether you are building a simple entryway welcome sign or a set of collapsible market display racks, having detailed schematics and material lists ensures a smooth building process. Comprehensive resources like Ted’s Woodworking Plans offer step-by-step blueprints, cutting guides, and expert advice to help you transform raw lumber into stunning, professional-grade signs and displays.

    Visit the reference link at TedPlansDIY>>

  • Reflecting Style: Building Custom DIY Wooden Mirrors

    Mirrors are essential elements of interior design. Beyond their functional role for grooming and personal care, mirrors visually expand small rooms, bounce natural sunlight deep into living spaces, and serve as striking artistic focal points. A well-placed mirror wrapped in a quality wooden frame elevates the tone of any entryway, bathroom, or bedroom.

    While commercial store-bought mirrors are frequently housed in cheap plastic moldings or flimsy particleboard, constructing your own custom wooden mirror frames allows you to create durable, heirloom-quality pieces tailored to your exact space dimensions. Utilizing step-by-step DIY woodworking plans—such as those available from Ted’s Woodworking—empowers builders of all experience levels to design and assemble stunning custom mirror frames.

    Why Build Your Own DIY Wooden Mirrors?

    Crafting custom mirror frames combines practical glass fitting with rich woodworking techniques:

    1. Custom Sizing & Dimensions: Build custom wall-to-wall vanity mirrors or oversized floor mirrors designed specifically for unique wall dimensions and room layouts.
    2. Premium Solid Timber: Utilize durable hardwoods like Walnut, Oak, Maple, or Pine for longevity and natural wood grain warmth.
    3. Affordable Luxury: Large designer mirrors carry expensive store price tags. Building your own delivers luxury aesthetics at a fraction of the retail cost.

    Popular DIY Wooden Mirror Frame Designs You Can Build

    1. Full-Length Leaner & Floor Mirrors

    Oversized wooden frames designed to rest gracefully against bedroom or dressing room walls. A thick, solid hardwood border creates a dramatic focal point while reflecting light across the entire room.

    2. Rustic Barn Wood & Farmhouse Frames

    Featuring distressed timber, cross-beam corners, or decorative metal accents. These frames add cozy rustic warmth and texture to entryways and living spaces.

    3. Bathroom Vanity Mirrors with Storage Shelves

    Functional wall-mounted frames incorporating built-in bottom ledge shelves or side cabinets. Perfect for holding toiletries, soap dispensers, or small decor pieces in compact powder rooms.

    4. Geometric & Segmented Sunburst Frames

    For woodworkers seeking a creative challenge, assembling round, octagonal, or sunburst frames from segmented timber blocks produces an eye-catching modern art piece for living room accent walls.

    Essential Tips for DIY Mirror Frame Assembly

    • Deep Backing Rabbets: Cut a clean rear rabbet groove deep enough to hold the mirror glass, protective backing board, and glass retainer clips flush against the frame.
    • Reinforce Frame Corners: Because mirror glass adds significant weight, reinforce miter joints using corner splines, pocket screws, or metal brackets to prevent frame sag.
    • Heavy-Duty Mounting: Always mount large wall mirrors using heavy-duty French cleats fastened directly into wall studs for maximum security.
    • Moisture Protection: For bathroom vanity mirrors, seal all sides of the wood with water-resistant polyurethane or marine varnish to prevent warping from steam.

    Reflect Your Craftsmanship Today

    Whether you are crafting a simple hall mirror or an intricate vanity cabinet, having clear blueprints and cutting lists ensures a smooth and successful project. Comprehensive resources like Ted’s Woodworking Plans provide step-by-step schematics, material recommendations, and joinery guides to help you transform raw lumber into stunning mirrored focal points.

    Visit the reference link at TedPlansDIY>>

  • Illuminating Craftsmanship: Building Custom DIY Wooden Lamps

    Lighting plays a crucial role in shaping the atmosphere, mood, and style of any home. While standard lighting fixtures serve a basic function, a custom wooden lamp serves as both an inviting light source and a striking decorative sculpture. The natural warmth of timber combined with soft illumination instantly creates a cozy, welcoming ambiance.

    Instead of purchasing generic, factory-made lighting fixtures from retail stores, building your own handcrafted wooden lamps allows you to tailor every detail to your decor. Using detailed DIY woodworking plans—such as those available from Ted’s Woodworking—empowers makers of all skill levels to construct safe, beautiful, and functional lighting pieces.

    Why Build Your Own Custom Wooden Lamps?

    Designing and constructing custom wooden lamps provides a unique blend of practical electrical wiring and creative woodwork:

    1. Unique Artistic Accent: Combine unique grain patterns, geometric angles, or turned wood posts to craft an exclusive lighting accent found nowhere else.
    2. Custom Atmosphere: Select exact heights, bulb temperatures, and shade pairings to achieve precise task lighting or gentle ambient illumination.
    3. Accessible Crafting: Lamps are ideal projects for using leftover hardwood offcuts, requiring minimal raw materials while delivering maximum visual impact.

    Popular DIY Wooden Lamp Styles You Can Build

    1. Minimalist Table & Desk Lamps

    Featuring sleek block bases, articulated wooden arms, or geometric open-frame cubes. These compact fixtures are perfect for nightstands, home office desks, or reading nooks.

    2. Rustic Wooden Tripod Floor Lamps

    Inspired by mid-century studio lighting, wooden tripod floor lamps feature three tapered legs supporting a central cord assembly and drum shade. They bring height, balance, and modern elegance to living rooms.

    3. Hanging Wooden Pendant Lights

    Utilizing laser-cut timber slats, bent-plywood ribbons, or rustic beam blocks suspended above kitchen islands or dining tables, pendant lamps project captivating light and shadow patterns.

    4. Live-Edge & Log Table Lamps

    Highlighting the raw, unpolished beauty of natural timber, live-edge slab bases or hollowed-out log lamps introduce organic, rustic warmth into cozy cabin or farmhouse spaces.

    Essential Tips for DIY Lamp Woodworking & Assembly

    • Internal Wire Channels: Plan your wire routing carefully—drill clean center channels or cut concealed grooves before gluing lamp base segments together.
    • Electrical Safety: Always use UL-tested lamp kits, socket assemblies, and insulated wiring to ensure complete fire and electrical safety.
    • Heat Management: Use energy-efficient LED bulbs that emit low heat, protecting delicate wood finishes and surrounding shades.
    • Stable Weight Distribution: Ensure table and floor lamp bases are adequately weighted and balanced to prevent accidental tipping.

    Illuminate Your Space with Custom DIY Plans

    Whether you are building a simple wooden block desk lamp or an intricate multi-slat pendant fixture, having clear blueprints and wiring layouts makes the process rewarding and straightforward. Comprehensive guides like Ted’s Woodworking Plans offer detailed schematics, step-by-step assembly steps, and material lists to help bring your lighting ideas to life.

    Visit the reference link at TedPlansDIY>>

  • Framing Memories: The Art of Building DIY Wooden Frames

    A frame is far more than a simple border—it is the bridge between a piece of art and the room it inhabits. Whether displaying family portraits, original artwork, diplomas, or memorabilia, the right frame enhances color, draws the viewer’s eye, and protects cherished items for years to come.

    While store-bought frames are often limited to standard sizes and cheap synthetic composite materials, building your own custom wooden frames gives you complete creative control. Utilizing detailed DIY woodworking plans—such as those available from Ted’s Woodworking—empowers makers to craft beautifully mitered, solid wood frames perfectly proportioned for any project.

    Why Build Your Own Custom Wooden Frames?

    Crafting custom picture and canvas frames is one of the most practical and satisfying woodworking skills you can learn:

    1. Perfect Proportions: Non-standard art prints or odd-sized photos often require expensive custom framing shops. DIY framing solves this at a fraction of the price.
    2. Premium Wood Options: Craft frames using rich, authentic hardwoods like Walnut, Oak, Cherry, or Maple instead of flimsy plastic and veneered particleboard.
    3. Custom Finishes: Match your interior decor with precision through custom stains, distressing, milk paint, or sleek natural oils.

    Popular DIY Wooden Frame Styles You Can Build

    1. Floating Canvas Frames

    Popular for stretched canvas art, floating frames create a thin gap between the edge of the artwork and the inner frame wall. This design gives paintings a sleek, modern, gallery-like presentation.

    2. Classic Mitered Picture Frames

    Featuring precise 45-degree miter corners, rabbeted back grooves for glass and backing boards, and optional decorative profiles. Perfect for prints, photographs, and certificates.

    3. Deep-Set Shadow Box Frames

    Designed with extended depth to house 3D objects, sports memorabilia, medals, dried flowers, and delicate sculptures while shielding them behind protective glass.

    4. Rustic Reclaimed Wood Frames

    Built from weathered barn wood or recycled pallets, these frames add warmth, texture, and character to farmhouse or industrial-style interiors.

    Essential Tips for Precision Picture Framing

    • Tight Corner Miters: Use a dedicated miter sled or precise drop-saw settings to ensure tight, seamless 45-degree corner joints.
    • Reinforce Joints: Strengthen miter joints using wooden splines, corner keys, or pocket nails to prevent joints from separating over time.
    • Rabbet Depth: Ensure your rear rabbet (groove) is cut deep enough to accommodate glass, matting, artwork, and backing board snugly.
    • Glass Cutting & Matting: Pair custom frames with acid-free mat board and anti-glare glass for museum-quality archival protection.

    Start Crafting Custom Frames Today

    Whether you are framing a single family photo or creating an entire gallery wall, having clear blueprints and cutting guides makes all the difference. Comprehensive platforms like Ted’s Woodworking Plans provide step-by-step schematics, material lists, and joinery guides to help you transform raw lumber into gallery-worthy frames.

    Visit the reference link at TedPlansDIY>>

  • Functional Elegance: Crafting Custom DIY Wooden Coat Racks

    An entryway is the first impression of any home, and keeping it tidy, organized, and welcoming can be a daily challenge. Coat racks serve as the unsung heroes of home organization, offering dedicated storage for jackets, coats, hats, scarves, and bags right where you need them most.

    While store-bought racks often feel flimsy or generic, building your own custom wooden coat rack allows you to combine durability with tailored aesthetics. Utilizing comprehensive DIY woodworking plans—such as those available from Ted’s Woodworking—enables makers of all experience levels to build sturdy, beautiful storage solutions that elevate the functionality of any space.

    Why Choose a DIY Wooden Coat Rack?

    A custom wooden coat rack bridges the gap between utilitarian organization and refined interior decor:

    1. Maximized Space Utilization: Customize exact dimensions to fit tight hallways, compact entryways, or expansive mudrooms perfectly without wasting valuable floor space.
    2. Superior Strength & Stability: Solid wood construction paired with proper joinery easily handles heavy winter coats, backpacks, and everyday family gear without bending or tipping.
    3. Custom Style Matching: Choose hardware, finishes, stains, and wood species (like Oak, Walnut, or Pine) that complement your home’s unique design aesthetic.

    Popular Wooden Coat Rack Designs You Can Build

    1. Wall-Mounted Rail with Top Shelf

    A space-saving classic featuring a solid wooden backplate, metal or wooden hooks, and an upper shelf for decorative items, mail, or storage baskets. Ideal for narrow entryways and apartments.

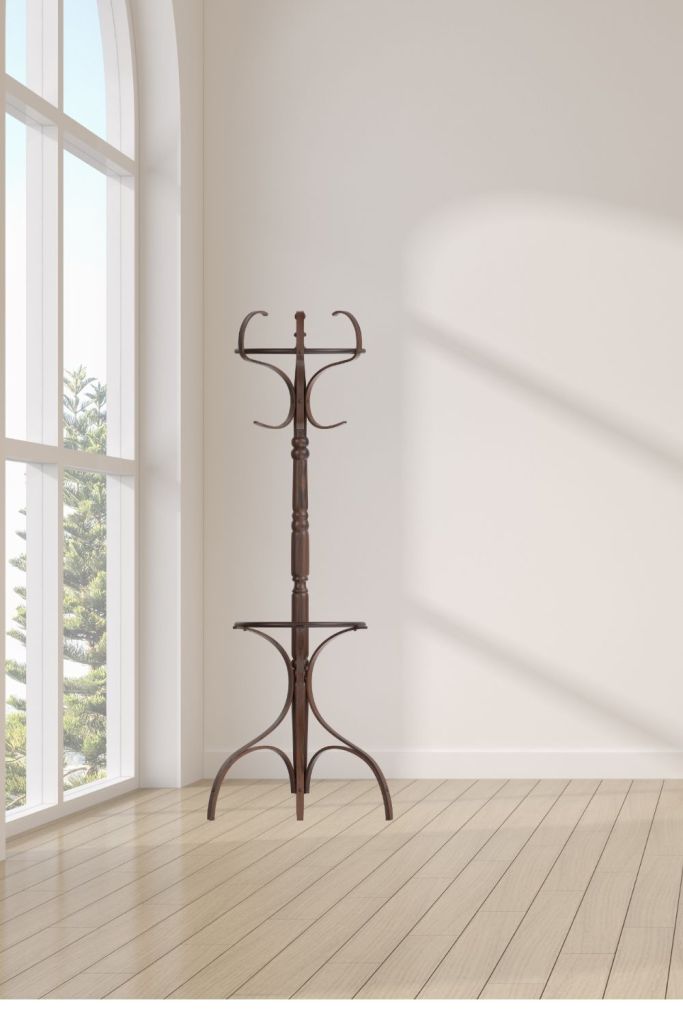
    2. Freestanding Coat Tree

    A traditional standing coat rack featuring a sturdy weighted base and angled wooden pegs or hooks at varying heights. Great for room corners and spaces without dedicated hall closets.

    3. All-in-One Hall Tree Bench

    A comprehensive entryway unit combining a coat hanging rack, built-in seating bench, and lower shoe storage cubbies. Ideal for busy households looking for complete mudroom organization.

    4. Modern Piano / Foldable Peg Rack

    A sleek, minimalist design featuring flush-mounted wooden pegs that flip down when needed and fold flat when empty. A contemporary statement piece that acts as functional wall art when not in use.

    Pro Tips for Building a Durable Coat Rack

    • Secure Wall Anchoring: Wall-mounted units must be fastened directly into wall studs or secured with heavy-duty anchors to prevent pulling away under heavy weight.
    • Sturdy Joinery: For standing coat trees or bench units, use robust joinery techniques (such as dowels, pocket holes, or mortise-and-tenon) to withstand daily leverage and weight.
    • Hardware Selection: Choose high-quality metal hooks or turn smooth custom wooden pegs on a lathe for a cohesive, long-lasting build.
    • Protective Coating: Apply a durable finish like polyurethane or lacquer to protect the wood from damp coats, wet umbrellas, and everyday wear.

    Bring Order to Your Entryway Today

    Whether you need a simple wall-mounted peg rail or a multi-functional hall tree bench, having clear, step-by-step schematics makes the building process smooth and enjoyable. Comprehensive resources like Ted’s Woodworking Plans offer detailed blueprints, cutting lists, and material guides to help you transform raw lumber into functional home accents.

    Visit the reference link at TedPlansDIY>>

  • Timeless Craftsmanship: The Art of Building DIY Wooden Clocks

    Clocks are far more than mere instruments for measuring time—they are statement pieces, decorative focal points, and timeless symbols of craftsmanship. A handmade wooden clock brings warmth, character, and an air of sophistication into any room, seamlessly blending practical utility with artistic expression.

    While commercial mass-produced clocks often lack soul and individuality, crafting your own wooden timepiece allows you to design a heirloom-quality accent tailored to your unique decor. By utilizing detailed DIY woodworking plans—such as the extensive blueprints available through Ted’s Woodworking—woodworkers of all skill levels can successfully construct custom clocks that stand the test of time.

    Why Craft Your Own Wooden Clock?

    Building a clock is one of the most rewarding woodworking projects you can undertake. It demands a blend of structural joinery, delicate detailing, and precise assembly:

    1. Custom Aesthetics: Select exact wood species, grain patterns, stains, and clock faces to match rustic, traditional, or contemporary interior styles.
    2. Unmatched Value: High-end wooden clocks command premium retail prices. DIY construction allows you to achieve luxury results at a fraction of the cost.
    3. Heirloom Appeal: A handcrafted clock carries personal legacy and story, making it a prized family keepsake or an extraordinary gift for loved ones.

    Popular Wooden Clock Styles You Can Build

    1. The Grandfather / Longcase Clock

    The ultimate hallmark of woodworking mastery. Standing tall with majestic presence, a grandfather clock features intricate cabinet work, weight-driven pendulum movements, and classic glass paneled doors. It serves as a commanding centerpiece in dining rooms or foyers.

    2. Classic Mantel & Bracket Clocks

    Designed to sit elegantly atop fireplaces, bookshelves, or sideboards, mantel clocks feature compact, arched, or boxed wooden enclosures. They offer the perfect balance of traditional charm and manageable project scale for intermediate craftspeople.

    3. Rustic & Modern Wall Clocks

    From large round farmhouse-style wooden dials with Roman numerals to sleek minimalist hardwood frames, wall clocks offer endless creative freedom. Live-edge wood slabs or segmented wooden rings create striking modern wall art.

    4. Cuckoo & Mechanical Novelty Clocks

    For craftspeople who love complex mechanics and detailed decorative carving, cuckoo clocks and exposed wooden-gear clocks present an exciting challenge that showcases technical mastery.

    Essential Tips for Clockmaking Projects

    • Precision Cutting: Door frames, clock face cutouts, and glass channels require exact measurements to ensure components align seamlessly.
    • Choosing the Right Movement: Decide early between traditional mechanical pendulum movements or modern, low-maintenance quartz battery mechanisms.
    • Wood Selection: Hardwoods like Walnut, Cherry, Oak, and Mahogany offer exceptional stability and rich finishing characteristics ideal for fine clockwork.
    • Finishing Touches: Apply multiple thin coats of satin polyurethane or hand-rubbed Danish oil to highlight natural grain depth without heavy buildup.

    Turn Plans into Timeless Creations

    Whether you are embarking on your first simple wall clock or tackling a grand tall-case masterpiece, having clear, accurate schematics is essential. Comprehensive resources like Ted’s Woodworking Plans provide step-by-step instructions, cutting lists, and detailed blueprints to guide you through every cut, join, and finish.

    Visit the reference link at TedPlansDIY>>

  • Creative and Functional DIY Ideas for Artwork Displays

    Displaying artwork is one of the most effective ways to personalize a space, bring color into a room, and showcase personal creativity or cherished collections. Whether you are an artist looking to present your work, a parent displaying your children’s masterpieces, or a homeowner curating a gallery wall, having the right display structure makes all the difference.

    Instead of relying on store-bought frames that may not fit your specific dimensions or style, creating custom wood artwork displays using DIY woodworking plans—such as those found on Ted’s Woodworking—allows you to build durable, tailored, and aesthetically pleasing display solutions.

    Why Choose DIY Woodworking for Artwork Displays?

    1. Customization and Perfect Fit: Pre-made frames and display shelves often come in standard sizes. DIY woodworking allows you to craft displays that fit exact wall dimensions or specific artwork proportions.
    2. Material Quality: Building your own display gives you control over the materials. You can choose premium hardwoods, rustic reclaimed wood, or lightweight options depending on your decor.
    3. Cost Efficiency: Creating multi-picture displays or large gallery ledges yourself is significantly more affordable than purchasing custom-framed units.

    Top Artwork Display Concepts You Can Build

    1. Picture Ledges & Floating Shelves

    Floating ledges are a versatile choice for modern artwork displays. Unlike fixed wall frames, picture ledges allow you to layer, swap, and rearrange art pieces without drilling new holes into your walls every time.

    • Key Features: A narrow groove or lip at the front edge prevents frames from sliding off.
    • Best For: Canvas prints, framed photos, and mixed-media art.

    2. Classic Hardwood Frames & Shadow Boxes

    Creating your own wooden frames gives you total creative control over finishes, stains, and matting. For 3D art, souvenirs, or textured canvas pieces, shadow boxes provide depth and protection while adding a sophisticated look to the room.

    3. Studio & Display Easels

    An easel is not just a tool for painting—it also serves as a striking standalone display piece for large paintings or canvas prints.

    • A-Frame Easels: Compact and easy to fold away when needed.
    • H-Frame Easels: Sturdy, heavy-duty displays ideal for floor placement in living rooms or studio galleries.

    4. Children’s Art Hanging Rails

    For dynamic and frequently updated displays, a wooden hanging rail with clips or magnetic strips is ideal. It allows parents to quickly showcase new drawings and crafts without needing glass or rigid frames.

    Tips for Building an Effective Artwork Display

    • Measure Twice, Cut Once: Follow detailed woodworking plans to ensure precise angles, especially when crafting mitred corners for picture frames.
    • Choose the Right Finish: Match the wood stain or paint to the mood of the artwork. Neutral tones (matte black, white, or natural oak) allow the art itself to be the focal point.
    • Secure Mounting: Artwork displays, especially heavy floating shelves or large frames, require proper wall anchors or studs to ensure stability and safety.

    Getting Started

    Whether you are a beginner or an experienced woodworker, having step-by-step instructions and clear schematics makes the building process smooth and enjoyable. Comprehensive resources like Ted’s Woodworking Plans offer a wide variety of printable blueprints, cutting lists, and material guides to help you bring your custom artwork display projects to life.

    Visit the reference link at TedPlansDIY>>