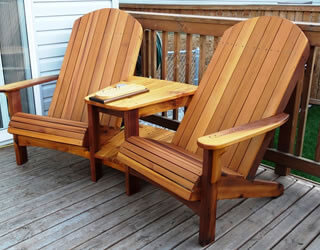
Adirondack Chairs
The Hidden Pitfalls of Generic DIY Plans
While an Adirondack chair might appear to be a simple, straightforward woodworking project, many who attempt it using generic blueprints or free plans found online often encounter frustrating obstacles along the way, including:
- Inaccurate Proportions and Dimensions: The sloping angles of an Adirondack chair require extreme precision. If a plan miscalculates a measurement by even a fraction of an inch, the entire structure can end up warped, unstable, or structurally weak.
- Skipped Steps and Missing Details: Standard blueprints often display only the fully assembled product without clarifying the actual Assembly Order. This forces builders to play a guessing game, which frequently leads to costly mistakes.
- Over-Budget Material Expenses: Lacking a detailed Material List and a comprehensive Cut List causes many DIYers to make multiple unexpected trips to the hardware store, or worse, end up with expensive wood wasted in the garage.
Guaranteeing Success with “Shop-Tested Blueprints”
The ultimate key to transforming ordinary wooden boards into a comfortable, durable Adirondack chair is having a comprehensive and hyper-accurate blueprint. According to insights from TedsWoodworking (tedplansdiy.com)—one of the world’s largest collections of woodworking plans proven by real-world builders—there are essential criteria you must look for when choosing a plan for outdoor furniture or Adirondack projects:
- Multi-Angle Schematics & Exploded Views: A proper plan must feature detailed three-dimensional exploded diagrams. This ensures you see exactly how every joint, slot, and internal support aligns, eliminating guesswork when driving screws or fastening bolts.
- Dead-On Cut Lists: A high-utility plan calculates precise wood dimensions and cut lines down to 1/16 of an inch. This allows you to purchase only the exact amount of lumber required, protecting your budget from unnecessary material waste.
- Shop-Tested Validation: Before a blueprint ever reaches your workbench, the design should be physically built, cut, and assembled within a professional workshop. This guarantees that when you follow steps 1, 2, and 3, your finished piece will perfectly match the illustration and function flawlessly without unexpected errors.
Conclusion
Building your own Adirondack chair is well within your reach, whether you are a complete beginner picking up a saw for the first time or a seasoned woodworker looking for your next weekend project. The single most important factor is having clear, sequential instructions that leave zero room for interpretation.
If you are looking for design inspiration, diverse Adirondack styles, or other rewarding outdoor woodworking projects that can be completed over a single weekend, you can explore detailed material prep guides and download comprehensive blueprints at TedsWoodworking Plans. This small step guarantees that your next patio furniture project will turn out beautiful, sturdy, and entirely worth your investment.

Leave a Reply
You must be logged in to post a comment.